With 4.18 onwards , if you use RACE, first create the Task in RACE. TP then can display the correct TASK ID from RACE.
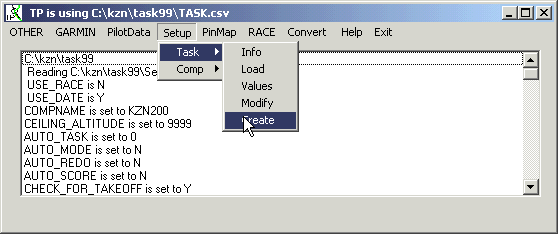
Assuming the code is installed and you did define a competition using SETUP/COMP/CREATE
Next we have to create a comp_id.csv file which is the official turnpoint file and then define a Task.
At the beginning of a competition one has to download from the GPS all the defined Turnpoints, Take Off areas and Goals.
A turnpoint data file called comp_id.csv, located in the competition directory, is used to provide the GPS coordinates.
You can create a turnpoint data file either by download waypoints
from a GPS as explained in the GARMIN
section.
And then use the Create Turnpoint file button in the GARMIN panel.
Or use any of the other GPS device interface options which allow you
to download waypoints into a whatever.csv file.
Then copy from that whatever.csv file , located in your working directory,
the turnpoint entries over into the comp_id.csv file in the competition
directory.
Or you can create a turnpoint data file from turnpoints located in RACE by using the menu RACE/UPLOAD/RACE>CSV.
If you use the GPS route to create a turnpoint data file, go out and
collect your turnpoints by using Mark Enter on a GARMIN GPS.
Then use GARMIN DOWNLOAD the waypoints which end up in a file called
WAYPOINTx.csv. x=0,1,2,3
Then press the COPY button to copy WAYPOINTx.csv to the turnpoint data
file, which is called comp_id.csv. Comp_Id gets defined in
the COMP/CREATE.
One can add individual waypoints from the GARMIN DOWNLOAD window by clicking on a waypoint which will then be added to the turnpoint data file.
Another option to add a Turnpoint is using the SETUP/TASK/CREATE option by typing them in by hand.
Or , if you got multiple GPS with various Waypoints that you want to
use, download the waypoints into WAYPOINTx.csv, and then use Notepad and
edit, copy/paste
the waypoints that you want to use as turnpoints into comp_id.csv.
Make sure the comp_id.csv is located in the Competition directory.
Another possibility is to use RACE, define the Task there and then use
the Get Task from RACE button.
But RACE does not provide enough info to define a complete task for
TP. Afterwards one has to go through all the items and make sure they are
correct.

Task Create can also be used on an existing task to modify some of the values
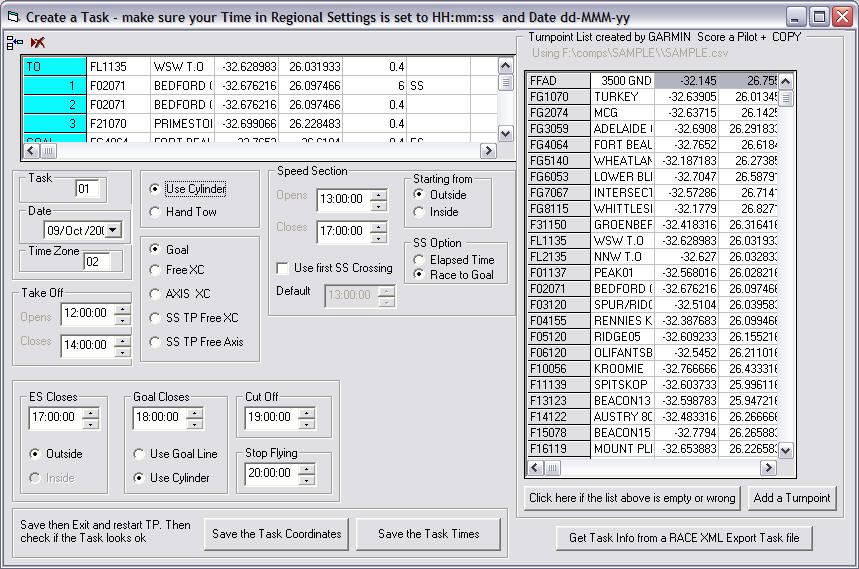
Click on the left list items of waypoints.
As you click on a waypoint in the right hand list it gets added to the task in the left side list.
One can delete an item in the task by clicking it, it gets red, and
then use the little red x icon in the top right corner.
![]()
One can insert a waypoint by clicking on an item in the list and using
the insert icon in the top right. a new empty line gets inserted.
Then click on one of the waypoints in the right to put it in there.
If a Turnpoints is also a SS then it has to be twice in the
task list.
First as an SS , then as a turnpoint.
An SS is not considered as a turnpoint for the task distance
calculation.
An SS can , for example, be a very far away point with a big radius,
and the pilots have to be on one side before a certain time.
Most of the time one has a
Take-Off
SS start Cylinder turnpoint with some km radius around it
and the same point is also a turnpoint with 400 meter radius
.... and then some more turnpoints
until one gets to Goal which is also the ES. Or 1st and ES
and then GOAL.
To modify the SS , click on the empty field of the turnpoint that should become the SS
To modify a cylinder radius, click on the radius and type in a new value.
In this example the ES is the same a GOAL and linked together.
Make ES Outside.

Takeoff TO L01
N02 is the SS with a 3 km radius starting from outside 
N02 is a turnpoint with a 400 meters radius

Takeoff L01
And SS is around takeoff L01 with a 5km radius starting from inside 
Not recommended. It makes it difficult for the pilots, to press GOTO once
they crossed the line.
One can also define a SS Cylinder that is not a turnpoint.
Let's say you want a start line which is quite straight, using a cylinder with a big radius and a waypoint far away.

With 4.24 onwards one can define a 1km ES around a 400m GOAL.
In case you got a ES which is not GAOL, make sure the ESisGOAL is not ticked
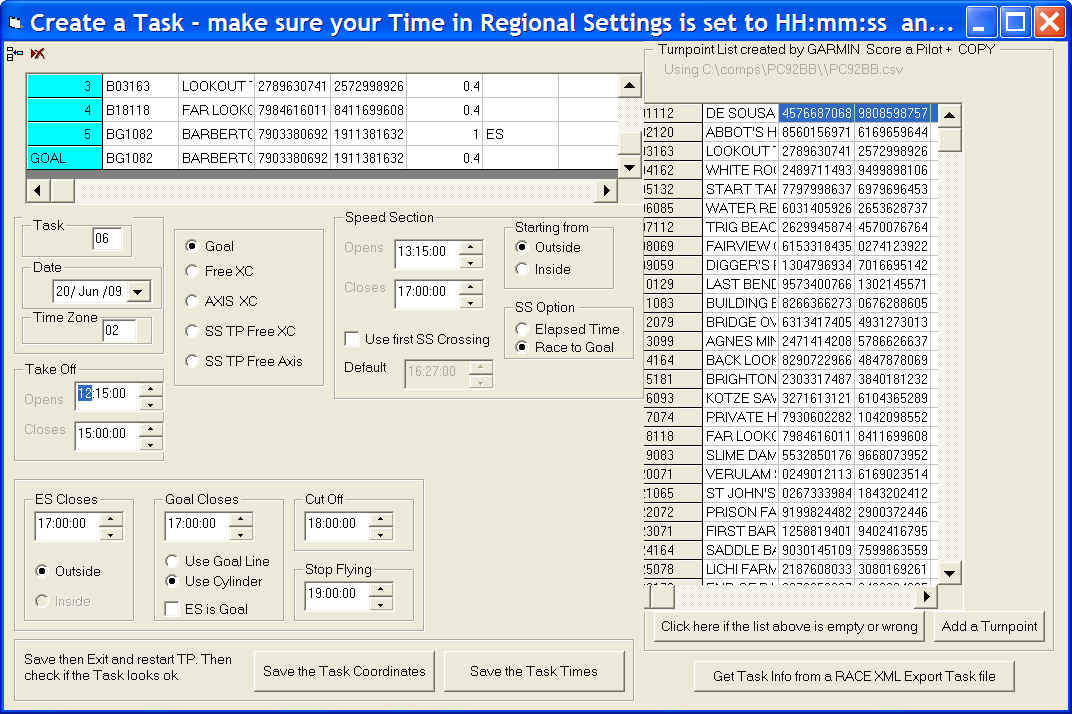
Preview shows then the task like this
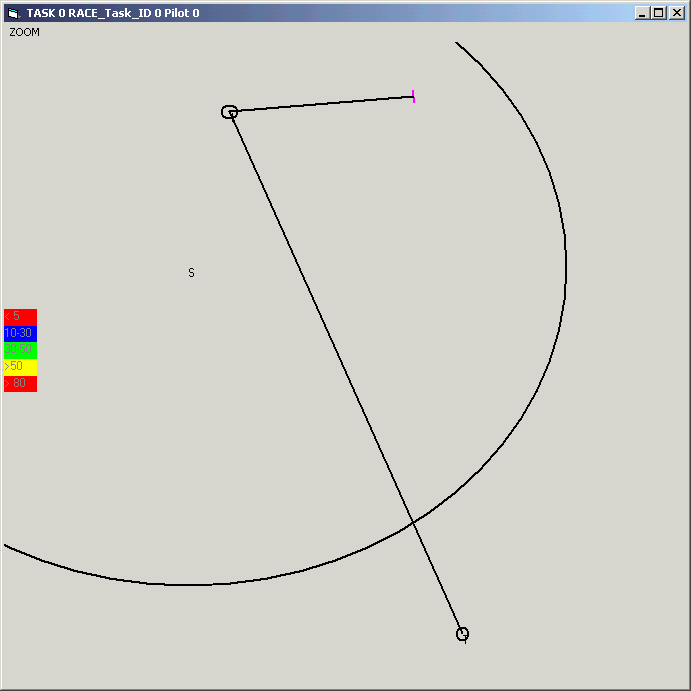
The elliptical circle distortion is due to using a Mercator projection in this case.
You can preview, and see if your task looks ok. There is a problem
sometimes with preview.
If preview is not showing what you expect, save the task first,
exit TP and start up again.
Saving the task times will set this defined task as the default for
the next startup.
It sets the AUTO_TASK value in the COMP.ini file of the comp directory.
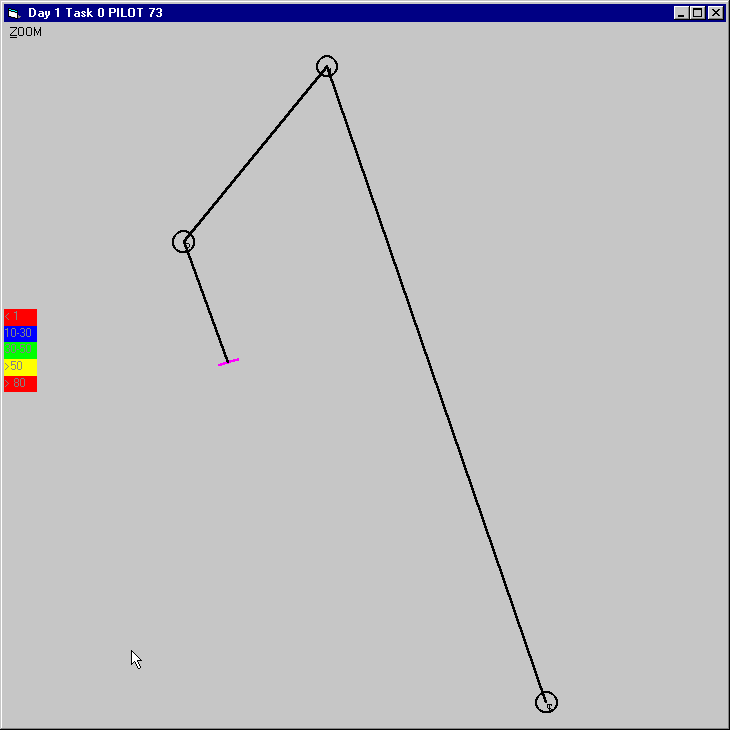
The code creates the subdirectory in the competition directory called TASKxx , xx = 01,02,03,.. as defined in the task entry field.
And a pilotdata subdirectory under it where the csv track files will be stored..
If you get it wrong, it might be best to start from scratch. SETUP/TASK/CREATE
Creating a new task and then overwriting whatever is there from a previous
attempt. Or if it just one or 2 values that are wrong, modify the ini and
csv files by hand with and editor like Notepad in the TASKxx directory.
To sum it up ..
Click/select a waypoint and it gets copied across.
And define the various times and date
Change the SS Start of Speed Section or ES End of Speed Section by
selecting a line in the task and the choose it to become an SS or ES
Change the radius values
Save the setup
If you battle to modify a value from the panels and menus for a task,
go into the comp/TASKxx directory and change via notepad or any other editor
the ini or csv files.
Once you are happy with your task definition, apply the 2 Save buttons
to save the task coordinates and the task times.
Then exit, start TP again and then use SETUP/TASK/VALUES
SETUP / TASK / VALUES
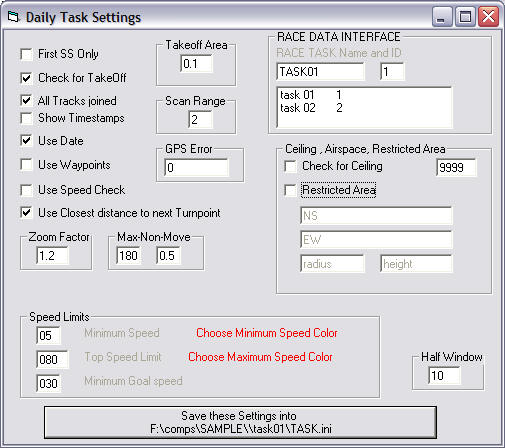
The RACE TASKID is not the same as the TASK Number used in the task creation.
For RACE XML Bulk file transfer the RACE Task ID MUST be correct
for each task.
Otherwise the wrong task gets updated .
Use MS Access to check the id used in RACE to find out the right
id.
Or create an XML file of a days task from RACE to find out the
correct number.
TP now focuses on the RACE Bulk XML file format to feeding RACE.
Make sure the TASK NUMBER used in TASK/CREATE matches the id used by
RACE.
You can call the directory anything you like when you use the XML Bulk
file.
As a 3rd option one can update the RACE database direct. But this is
not tested very often.
Especially in a networked environment with multiple machines accessing
a database on the server I am not sure if MS ACCESS Jetdb can handle and
lock unlock records to process multiple users. My experience with
using RACE over the network with 2 or more accessing RACE at the same time
creates lock problems.
Modify the fields. For the date use 28/Jul/2005 as entry format. For the
times use 12:45:00.
Make sure the PC Regional Settings under My Computer - Control
Panel , TIME tab is HH:mm:ss
And the date is dd/MMM/yyyy with a date separator /
The date format can vary, as long as all computer involved use the same format.
For processing IGC files and devices , like Competion/Compeo/5020/5030,... use a date format of dd/MMM/yyyy.
For De Aar one can activate ceiling check of 4300m.
Also can be used for other Sites where one has a height limit.
Restricted airspace is for De Aar the Hydra power distribution center. Or can be for Dasklip the parachute drop zone.
Center coordinates in decimal degrees and a radius in km, along with a minimum height to go over in meters.
TP checks if there is a new track log, after a pilot crossed SS and the new track log starts in the take off area.
For this the takeoff area value has to be big enough to capture a pilot if he re-launches again. If the site is an winch airfield ( like De Aar) and runways get changed during the day, and the takeoff coords are the center of the airfield, then make this value 2km. If it is a small takeoff, like Dasklip, then 0.2 km will do.
Exit TP, start again and TP by default will load the last saved
Task.
Or one can use Setup / Task / Load
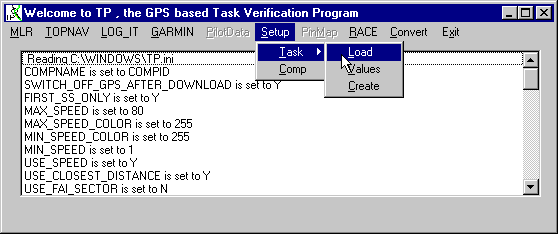
Make sure to click on the task directory so that a PILOTDATA sub directory appears.
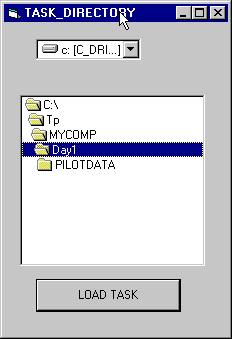
Repeat ... To activate and Load an existing Task, click on the directory
under the comp directory.
Do not select the Pilotdata directory !!!
Use SETUP/TASK/LOAD then use VALUES and CREATE. CREATE can also be used to modify task settings.
Then verify the values.
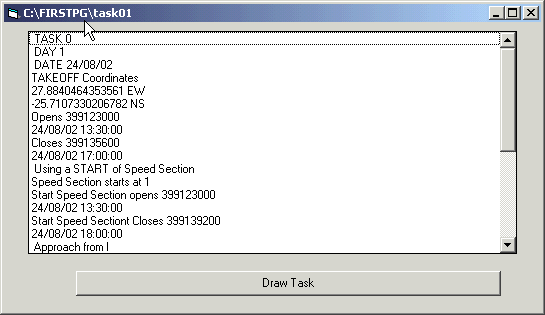
The long numbers are the date and times converted to GPS format. In case there is a problem in a pilot taking off before the window opens. This enables to check the track time stamps versus the time window open or close in GPS time format.
Remember, each task needs an own directory. Either choose an existing
directory and overwrite the task in it,
or create a new directory with
One can not edit an existing task.
To change an existing task, redefine it again and overwrite the task.csv
and and TASK.ini file in the TASKx directory
What means use the TASK02 directory in the TP_COMP_DIRECTORY
The program first reads the TP.ini file which is located where TP.exe is at home.
Then it reads the COMP.ini file in the comp directory.
And when one selects a task, it reads the TASK.ini file in the TASKxx directory.
Once you defined a task with it turnpoints, times and start and goal settings, then you are now ready to collect pilot track data for scoring by downloading data from a GPS.
See FAI or Cylinder
scoring
for details.
Use a known track first. Like your own flight. Where
you know what the score should look like.
To check if the result matches your expectations.
Then choose a GPS from an experienced pilot where you also know the
expected result.
Best have someone who got to goal and see if the score and goal
crossing time looks ok.
If there are any problems, fixing the settings values by hand in the TASK.ini or TASK.csv file and TASK.xml in the TASKxx directory will be the fastest way.